For Father’s Day this year, I decided to make my dad some cookies. I didn’t want to do the traditional necktie or mustache cookie…even though they’re adorable, I thought I’d go for something different and unique. I didn’t have the proper cutters, and me being a repeat winner of the Procrastinator of the Year award, I’d waited too late to order them in time for Dad’s Day. I was forced to dig around in the cookie cutters I already own and get creative…
So as the basis for my design is described in the card/topper that I made for dad:

To get thoughts from my head into the oven, this is what I had to work with:

A tie and a tulip. Can’t really say there’s a real valiant vibe to that, but we’re going with it…
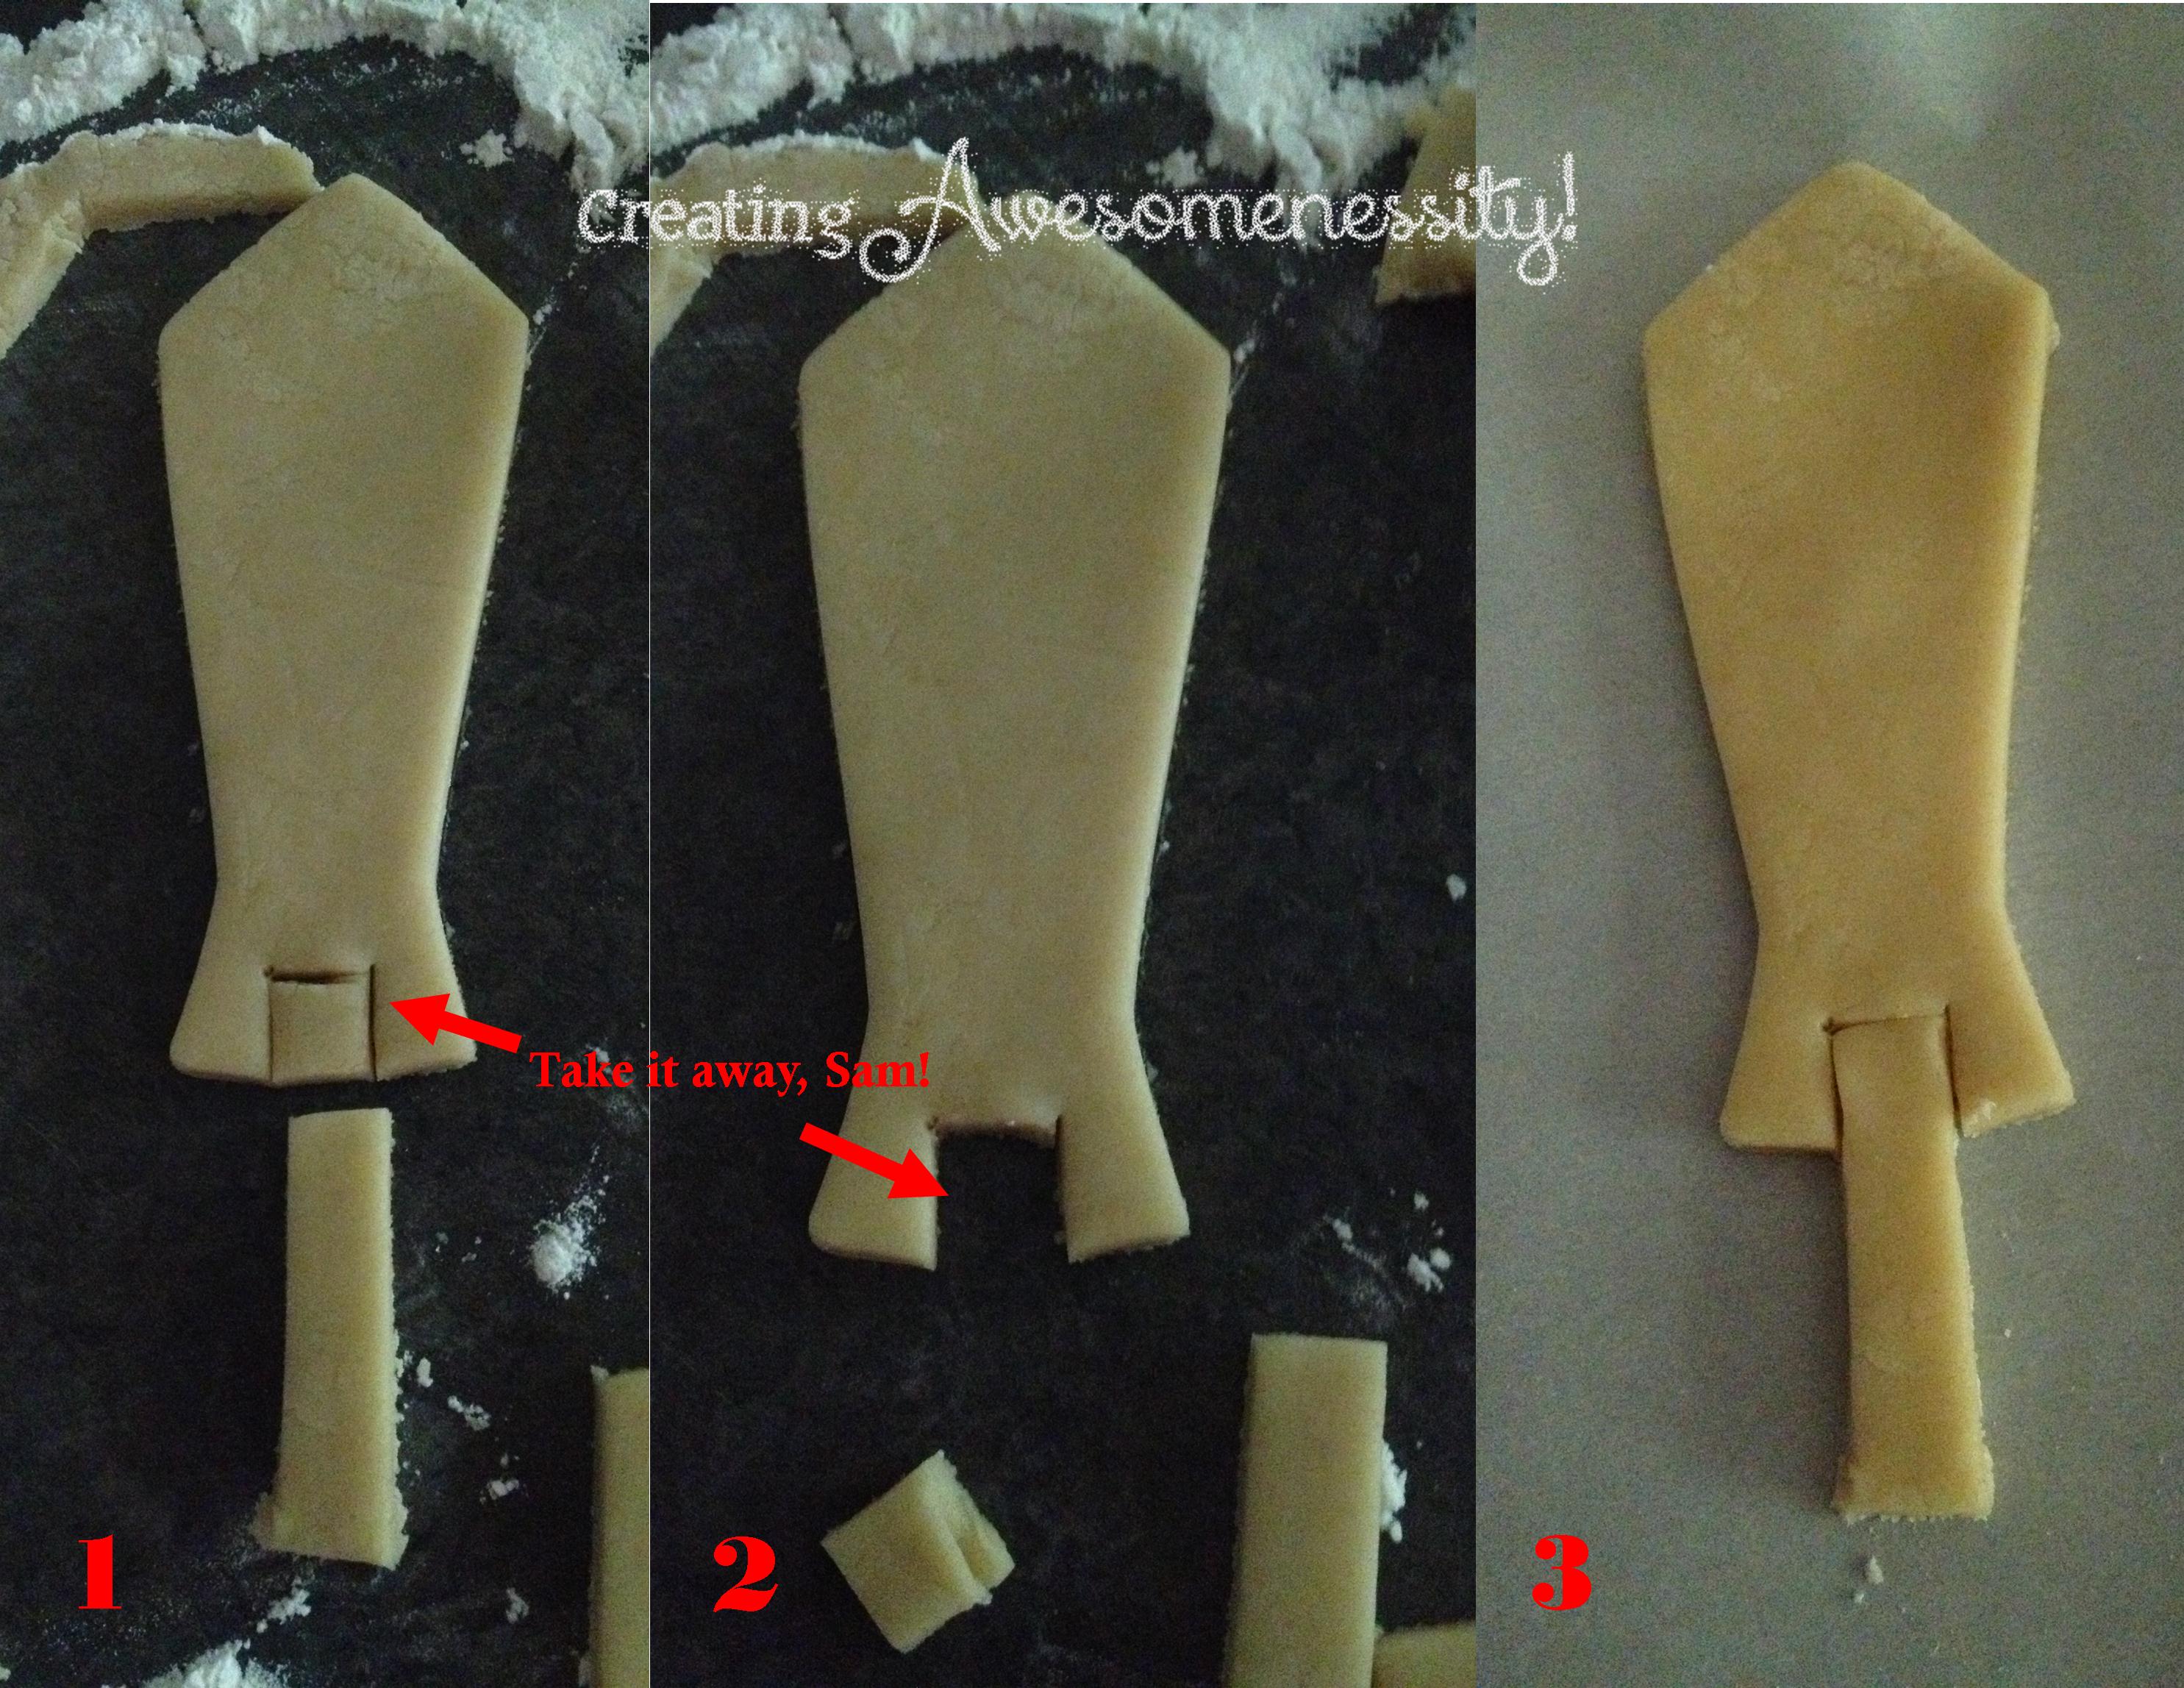
So the first thing, roll out your cookie dough, and place the cutters. Not really any magic to it, but make sure that you have enough space on the bottom part of the tie to make your handle for the sword.

To make the shield, the next step is to de-stem it…ie. cut off the part you won’t need. Simply using a non-serrated knife should be fine.

Making the handle of the sword is a little more involved, but still not very complicated at all. I free-handed the design, but if you’re not comfy with that, using a ruler or template is cool too 🙂 Make sure that you cut out the space to reinsert the handle and that it fits properly so that your cookie will bake together and close the gaps. If you reassemble the sword on your parchment paper before trying to move it, it will certainly save you some frustration…
Bake your cookies according to the directions for the recipe you’re using and let them cool completely before decorating.

Most decorators will tell you to wait a day so that the oils don’t leach into the icing, but I’m certain that they don’t have nearly as many Procrastinator of the Year awards as myself, so 30 min later…

Depending upon the consistency of your icing, you can outline and flood at the same time, which is what I choose to do…you know, with it being the Saturday afternoon before Father’s Day and all… I did the same technique when making the shields. I got so giddy coloring in the shield/rushed for time that I forgot to take pictures of these steps, but here’s the outline that I started with:

The one on the right reminded me of a police badge
Before the handle on the sword dried completely, I thought it would be fancy to add some pearl inlay:

While that was drying, I decided that I wanted to make an ornate emblem to put on the shield. I’m not that good of an artist so I have to compensate and get creative in that area too. My dad’s zodiac sign is Leo, so I thought. “Man, I’m gonna make a lion to put on his shield!” I found an image online, re-sized it to an inch to fit the shield and used my tracing prowess, a #1 and #2 tip and went to town!

Despite the perceived awesomeness of my idea, I have to be honest and say this next step was a pain in the butt! Transferring a 1″ piece of really delicate sugar is not the most fun process on the planet. I’m sure there are worse things, but after breaking this thing twice, it’s highly debatable. Carefully lift the image from the wax paper and place it gently on the shield. Try really hard not to swear if, and when, it comes apart. Use some wet icing to fix it to the shield and let it dry.
If you’re doing the tracing technique, make sure that you use plenty of shortening on your wax paper so that the design can be more easily peeled/slid off onto wherever it’s final destination happens to be. To get the shimmer, I just brushed them with luster dust.
So after all is said and done, I made my dad’s Father’s Day cookies and he loved them! It was amazing to see his reaction and then watch him devour them, just after stating that they were too pretty to eat. In all honesty, I might have been slightly offended if he didn’t eat them!


In retrospect, I think this would be a really cool technique to make shield for other themed parties…Princess Merida from Brave was just crowned as the 11th Disney Princess, so it may come in handy one day!